Blades or Propellers
There are volumes of books about blade design. It is one of the most discussed and theoretical aspects of wind generators. However, there seems to also be a body of thought that many simple designs will work relatively well. One can spend many days (as we have for ours) in making a set of blades or there are blades described here that people say that the have put together in a matter of just a few hours.
My thought is that in a nuclear recovery situation the idea may well be to get something up and working as quickly as possible and then once one has the opportunity to do so there is much information here that one can use to experiment and make up their own mind about the trade-off between the efficiency gain from blades that take much longer to build and those that work less well or don't last as long but are quicker to make.
Propellers: Technical info on how to build blades
This is a 13 page .pdf file from Hugh Pigott and it is chuck full of very technical diagrams and charts.
Propellers: And still more info on how to build blades
This is a 27 page .pdf file from Hugh Pigott with many more diagrams and pictures that may be even more helpful.
Blade Design: Some neat diagrams on blade design.
Blade Design: A blade in one hour.
|
|
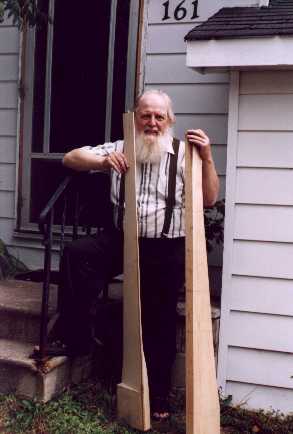 |
The blades for windmills are designed and work just opposite of those for airplanes. We are carving ours out of basswood because the wood is "clear" (that is to say the wood has no knots). Other kinds of wood will do, but there is a real art to carving the blades. On my right is a block that we start with and on my left the almost finished propeller blade.
Immediately following are the drawings that Ed drew for our blades.
|
|
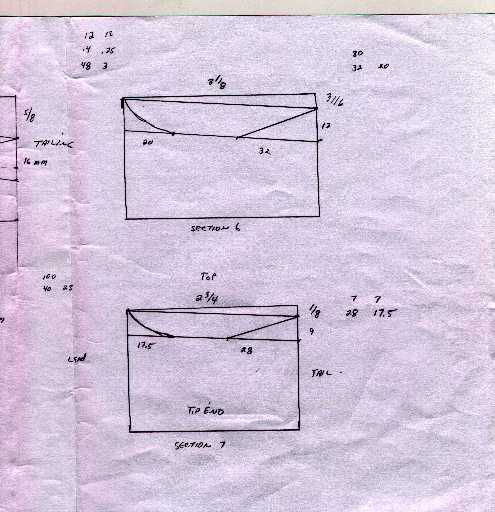
Ed's Blade Drawings
In this first drawing you see the rough shaped block of wood
and how it is marked out into "stations".
Take note that there is a leading edge and a tailing edge.
The leading edge is wider and blunt. The area behind the trailing edge is what is being cut away.
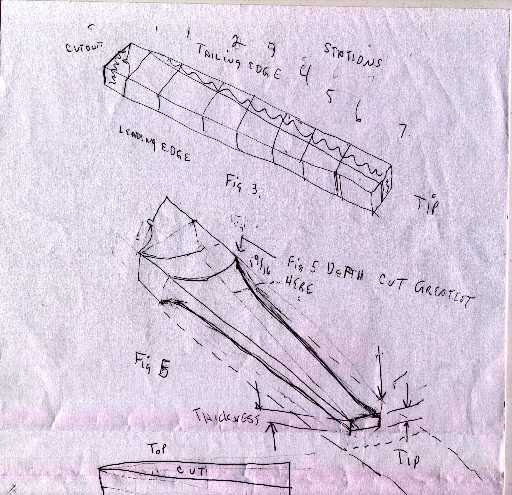
The tailing edge will be cut to a thin knife edge,
but in the drawings immediately above and below it is still blunt.
This shows a cross view of section 7 which is the very tip of the blade.
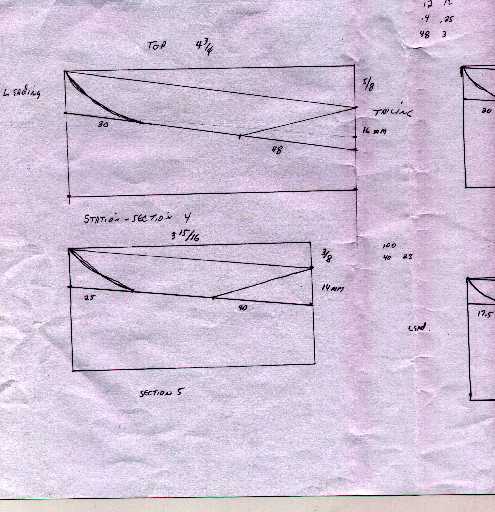
Each of the following drawings, starting at section 2 immediately below
and going through each drawing up to section 7,
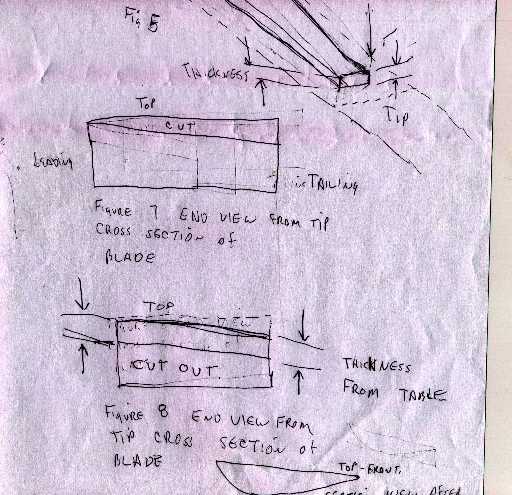
show a cross-section through the wood as to where the finished blade will lay at that point. The depths change at each station because the blade has a twist to it.
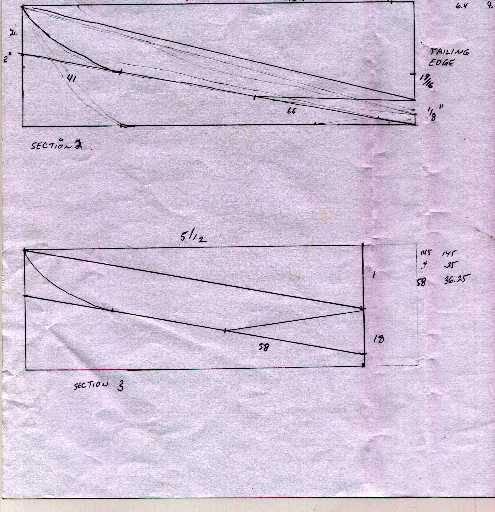
The table on this next drawing shows the thicknesses -
at each station.
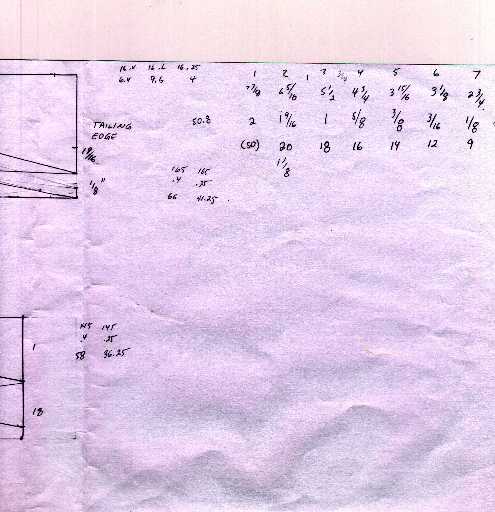
It can be seen from the end view of the block -
that about 80% of the wood is cut away in making a blade.
After the blade is sanded and finished
it is a good idea to armor the leading edge
that bites into the wind -
otherwise it will quickly wear down.
Armoring can be done with a heavy expoxy or resin -
laid on an eighth or more on an inch thick.
Periodic maintenace and re-armoring will preserve the blade -
and greatly increase its longevity.